Men’s Wetsuit Size Guide⁚ A Comprehensive Guide
Choosing the right wetsuit size is crucial for comfort, performance, and warmth in the water. This comprehensive guide will walk you through the key aspects of wetsuit sizing, ensuring you find the perfect fit for your next aquatic adventure.
Introduction
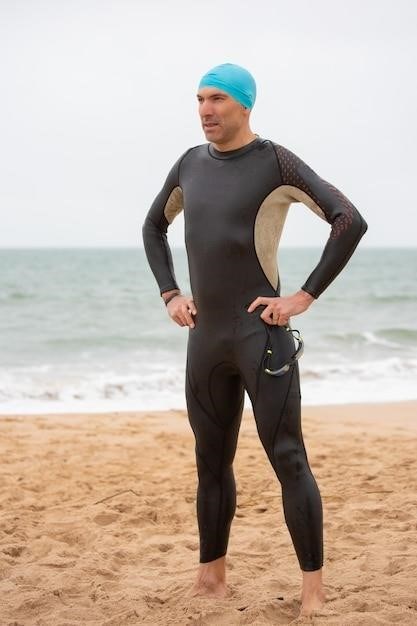
Wetsuits are essential gear for water sports enthusiasts, providing warmth, buoyancy, and protection from the elements. However, selecting the right size is crucial for optimal comfort, performance, and safety. A wetsuit that is too big will allow water to circulate, making you cold and uncomfortable. Conversely, a wetsuit that is too small will restrict movement and hinder your performance. This guide will provide you with the knowledge and tools to choose the perfect wetsuit size, ensuring you have a positive and enjoyable experience in the water.
Importance of Proper Wetsuit Fit
A properly fitting wetsuit is essential for several reasons. First, it ensures adequate warmth. A snug fit prevents water from circulating, trapping a layer of warm water against your skin. Second, a well-fitting wetsuit allows for optimal movement. It should not restrict your range of motion, allowing you to paddle, swim, and surf comfortably. Third, a proper fit enhances buoyancy. A wetsuit that fits correctly provides the right amount of buoyancy, aiding in your ability to float and maneuver in the water. Lastly, a good fit prevents chafing and discomfort. A wetsuit that is too tight can cause chafing, while one that is too loose can bunch up, leading to discomfort and irritation.
Wetsuit Size Chart⁚ Understanding the Basics
Wetsuit size charts are designed to help you find the right fit based on your body measurements. These charts typically list size ranges, corresponding to height, weight, chest, and waist measurements. The information provided on the chart is a general guide, and individual brands may have slightly different sizing systems. It’s essential to consult the specific size chart of the wetsuit brand you are interested in. Additionally, some brands offer sizing charts that include both metric and imperial units, making it convenient for users with different measurement preferences.
Key Measurements for Wetsuit Sizing
To ensure a proper fit, you’ll need to take a few key body measurements. These measurements are essential for selecting the correct size from a wetsuit size chart. The primary measurements include height, weight, chest, and waist. Height determines the overall length of the wetsuit, while weight provides an indication of the overall volume. Chest measurement is crucial for ensuring a comfortable fit around the torso, while waist measurement helps determine the fit around the midsection. It’s important to note that these measurements are just a starting point, and individual brands may have their own specific sizing guidelines.
4.1. Height
Height is a primary factor in determining the overall length of a wetsuit. It ensures that the wetsuit fits properly from your shoulders to your ankles. To measure your height, stand tall against a wall with your feet together. Make sure your back is straight and your head is level. Use a measuring tape to measure from the top of your head to the floor. Record your height in centimeters or inches. The height measurement is crucial for ensuring that the wetsuit is long enough to provide adequate coverage and prevent any discomfort or restriction of movement.
4.2. Weight
Weight plays a significant role in wetsuit sizing, as it influences the overall fit and comfort of the garment. A wetsuit that is too tight can restrict movement and cause discomfort, while one that is too loose may not provide adequate warmth and buoyancy. To determine your weight, stand on a scale and record the reading in kilograms or pounds. Wetsuit manufacturers typically provide weight ranges for each size, which serve as a guide for selecting the most appropriate option. Remember that weight can fluctuate, so consider your average weight when choosing a wetsuit.
4.3. Chest
The chest measurement is essential for achieving a snug fit in a wetsuit. To measure your chest accurately, stand tall with your arms relaxed at your sides. Wrap a measuring tape around the fullest part of your chest, ensuring it sits level and comfortably. Take the measurement at the end of a normal inhale, and record the result in centimeters or inches. A well-fitting wetsuit should feel comfortable around the chest, allowing for a full range of motion without feeling too tight or constricting. Be mindful of the chest size ranges provided by wetsuit manufacturers, as they can vary depending on the brand and style. A slightly snug fit in the chest area ensures a proper seal, helping to trap warmth and prevent water from entering the suit.
4.4. Waist
The waist measurement is crucial for achieving a comfortable and secure fit in a wetsuit. To measure your waist accurately, stand upright with your feet together. Wrap a measuring tape around the narrowest part of your waist, ensuring it sits level and comfortably. Take the measurement at the end of a normal exhale, and record the result in centimeters or inches. A properly fitted wetsuit should feel snug around the waist, providing support without feeling restrictive. For men, the waist measurement is particularly important for ensuring a proper seal around the core, which helps to trap heat and prevent water from entering the suit. If the wetsuit is too loose around the waist, it can allow water to seep in, making you feel cold and uncomfortable. Pay close attention to the waist size ranges provided by wetsuit manufacturers, as they can vary depending on the brand and style. Choosing a wetsuit with a waist measurement that falls within the recommended range will ensure a comfortable and functional fit.
Wetsuit Size Chart⁚ Common Size Ranges
Wetsuit size charts provide a general guideline for selecting the right size based on your body measurements. However, it is important to note that size ranges can vary between brands and styles. It’s always best to refer to the specific size chart provided by the wetsuit manufacturer you are considering. Here is a common size range that you may encounter⁚ XS (Extra Small)⁚ Typically fits individuals with a height of 5’6″ ౼ 5’8″ and a weight of 125 ⎻ 140 lbs. S (Small)⁚ Usually fits individuals with a height of 5’8″ ⎻ 5’10” and a weight of 135 ⎻ 155 lbs. M (Medium)⁚ Generally fits individuals with a height of 5’10” ⎻ 6’0″ and a weight of 140 ౼ 160 lbs. L (Large)⁚ Commonly fits individuals with a height of 6’0″ ౼ 6’2″ and a weight of 155 ⎻ 175 lbs. XL (Extra Large)⁚ Typically fits individuals with a height of 6’2″ ⎻ 6’4″ and a weight of 170 ⎻ 190 lbs. Remember that these are just general guidelines, and individual body proportions can vary. It is always recommended to refer to the specific size chart provided by the wetsuit manufacturer for the most accurate sizing information.
5.1. XS
XS (Extra Small) is the smallest size typically offered in men’s wetsuits. It is designed to fit individuals with a relatively slender build and shorter stature. While specific measurements can vary between brands, an XS wetsuit generally accommodates a height of 5’6″ to 5’8″ and a weight of 125 to 140 pounds. However, it’s crucial to note that these are just approximate ranges. For the most accurate fit, always refer to the size chart provided by the specific wetsuit manufacturer. Remember that wetsuits should fit snugly but not restrictively, allowing for a full range of motion. If you fall between sizes or are unsure about the best fit, erring on the side of sizing up is generally recommended. This will ensure that the wetsuit doesn’t feel too tight, potentially compromising your comfort and performance in the water.
5.2. S
The S (Small) size in men’s wetsuits is designed to fit individuals with a slightly larger build and taller stature than those who wear XS. While specific measurements can vary by brand, an S wetsuit typically accommodates a height of 5’8″ to 5’10” and a weight of 135 to 155 pounds. However, it’s important to remember that these are just general guidelines. Always consult the size chart provided by the specific wetsuit manufacturer for the most accurate measurements. Remember that wetsuits should fit snugly but not restrictively, allowing for a full range of motion. If you fall between sizes or are unsure about the best fit, erring on the side of sizing up is generally recommended. This will ensure that the wetsuit doesn’t feel too tight, potentially compromising your comfort and performance in the water.
5.3. M
The M (Medium) size in men’s wetsuits is intended for individuals who have a more substantial build and are typically taller than those who wear S. A Medium wetsuit usually caters to a height range of 5’10” to 6’0″ and a weight between 140 to 160 pounds. However, it’s important to note that specific measurements can vary across different brands. Always consult the size chart provided by the specific wetsuit manufacturer to get the most precise measurements. Remember that a wetsuit should fit snugly without restricting your movement. If you find yourself in between sizes or are unsure about the right fit, it’s generally recommended to size up. This will help ensure that the wetsuit doesn’t feel too tight, potentially hindering your comfort and performance in the water.
5.4. L
The L (Large) size in men’s wetsuits is designed for individuals who are taller and heavier than those who wear M. A Large wetsuit typically accommodates a height range of 6’1″ to 6’3″ and a weight between 160 to 180 pounds. These measurements are just guidelines, and it’s crucial to refer to the size chart provided by the specific wetsuit brand for accurate sizing. Remember that a wetsuit should fit snugly but not restrict your movement. If you fall between sizes or are unsure about the right fit, it’s generally recommended to size up. This will help ensure that the wetsuit doesn’t feel too tight, potentially hindering your comfort and performance in the water. Always prioritize finding a wetsuit that provides a comfortable and unrestricted fit.
5.5. XL
The XL (Extra Large) size in men’s wetsuits is designed for individuals who are the tallest and heaviest among the standard size range. An XL wetsuit typically accommodates a height range of 6’3″ to 6’5″ and a weight between 180 to 200 pounds. These measurements are just guidelines, and it’s crucial to refer to the size chart provided by the specific wetsuit brand for accurate sizing. Remember that a wetsuit should fit snugly but not restrict your movement. If you fall between sizes or are unsure about the right fit, it’s generally recommended to size up. This will help ensure that the wetsuit doesn’t feel too tight, potentially hindering your comfort and performance in the water. Always prioritize finding a wetsuit that provides a comfortable and unrestricted fit.
Tips for Choosing the Right Size
Choosing the right wetsuit size is essential for maximizing your comfort and performance in the water. Here are some valuable tips to guide you in finding the perfect fit⁚
- Consult the Size Chart⁚ Always refer to the specific wetsuit brand’s size chart for accurate measurements. Different brands may have slightly varying size ranges.
- Measure Yourself⁚ Take accurate measurements of your height, weight, chest, and waist. Use a tape measure and ensure a snug fit but not too tight.
- Consider Your Activity⁚ Different water sports require different levels of flexibility and mobility. For example, surfing may require a slightly looser fit, while swimming may benefit from a more snug fit.
- Try Before You Buy⁚ If possible, try on a wetsuit before purchasing. This will allow you to assess the fit and make sure it’s comfortable and unrestricted.
- Size Up If Needed⁚ If you fall between sizes or are unsure, it’s typically recommended to size up. A wetsuit should fit snugly but not be constricting.
Wetsuit Sizing for Specific Activities
The type of water sport you’re engaging in can influence the ideal wetsuit fit. Here’s a breakdown of sizing considerations for specific activities⁚
- Surfing⁚ Surfing wetsuits often require a slightly looser fit to allow for greater flexibility and movement. This ensures you can paddle and maneuver your board comfortably.
- Swimming⁚ For swimming, a more snug fit is generally preferred to reduce drag and enhance your stroke efficiency. A tighter wetsuit can help streamline your body in the water.
- Scuba Diving⁚ Scuba diving wetsuits need to be comfortable and allow for full range of motion while diving. They should fit snugly but not restrict your movement.
- Triathlon⁚ Triathlon wetsuits are designed for both swimming and cycling. They should be snug enough to reduce drag while swimming but not too tight to restrict your cycling performance.
Finding the right wetsuit size is essential for a comfortable and enjoyable experience in the water. Remember that wetsuits are designed for a snug fit, but they should never feel constricting. By following the guidelines in this guide, you can confidently choose a wetsuit that provides the perfect balance of warmth, flexibility, and performance. Always check the individual brand’s sizing chart for specific measurements, and if you find yourself between sizes, err on the side of choosing the larger size. With the right fit, you’ll be ready to conquer the waves, explore the depths, or simply enjoy a refreshing swim in comfort and style.