The Lycans Queen by L.S. Patel⁚ A Comprehensive Overview
The Lycans Queen by L.S. Patel is a captivating fantasy romance novel that takes readers on a journey through a world where humans, werewolves, and Lycans coexist. The story revolves around Aarya Bedi, a 19-year-old werewolf, and Adonis Dimitri Grey, the Lycan King, who are destined to be mates. The novel explores themes of love, destiny, and the struggles of finding one’s place in a world full of ancient magic and powerful creatures.
The World of The Lycans Queen
The world of The Lycans Queen is a richly imagined realm where humans, werewolves, and Lycans co-exist in a delicate balance. Lycans, the most powerful of the three, rule over the kingdom, their strength and longevity ensuring their dominance. The Lycan King, Adonis Dimitri Grey, holds the reins of power, and his decisions shape the fate of the entire realm. The Lycan Ball, a grand event where packs from across the kingdom gather, is a testament to the Lycan’s influence and serves as a platform for political maneuvering and romantic connections.
Werewolves, although less powerful than Lycans, are an integral part of the kingdom’s social fabric. They live in packs, each with its own traditions and beliefs, and play a crucial role in maintaining order and harmony. Aarya Bedi, a young werewolf from the Black Moon pack, finds herself drawn into the intricate world of Lycan politics when she is unexpectedly chosen as the Lycan King’s mate.
Humans, while not as powerful as Lycans or werewolves, hold their own place in this world. They live in harmony with the other races, and their presence adds a layer of complexity to the social dynamics. The novel explores the relationships between these three races, highlighting the challenges and opportunities that arise from their unique differences.
The Main Characters
The Lycans Queen features a cast of compelling characters, each with their own unique motivations and struggles. At the heart of the story is Aarya Bedi, a 19-year-old werewolf who embodies a blend of strength and vulnerability. She is a talented pack doctor, devoted to her family and community, but burdened by a past heartbreak that makes her hesitant to embrace the idea of finding a mate. When fate throws her into the path of the Lycan King, her world is turned upside down, forcing her to confront her deepest fears and desires.
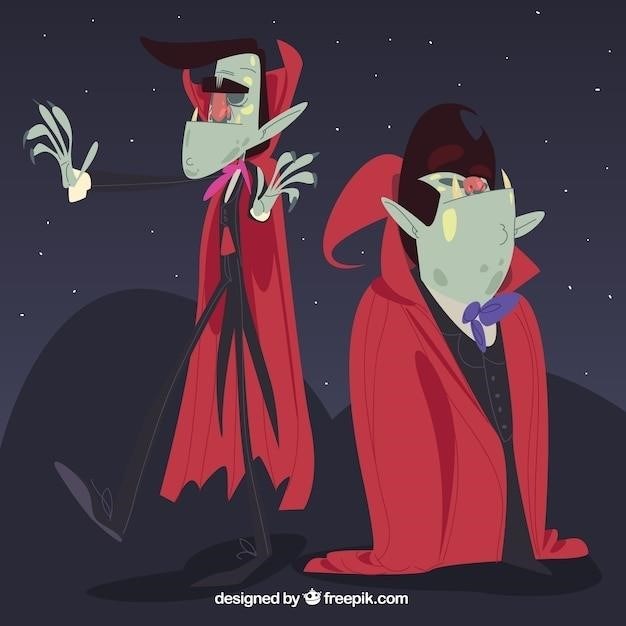
Adonis Dimitri Grey, the Lycan King, is a complex and enigmatic figure. He is the most powerful Lycan in the kingdom, known for his strength and cunning. However, he carries the weight of a solitary existence, having ruled for ten years without a mate. His cold and calculating demeanor is a shield against the pain of his loneliness, but beneath the surface lies a yearning for love and connection. His encounter with Aarya awakens a dormant part of his soul, challenging him to embrace vulnerability and trust.
The supporting characters, such as Sophia Butler, Aarya’s best friend, and Luke Martin, Sophia’s Lycan mate, add depth and dimension to the story. They provide Aarya with support and guidance, navigating the complexities of the Lycan world and offering glimpses into the different facets of Lycan society.
Adonis Dimitri Grey⁚ The Lycan King
Adonis Dimitri Grey, more commonly known as Dimitri, is the enigmatic Lycan King who rules over the kingdom. He is a formidable figure, renowned for his strength, cunning, and unwavering resolve. Dimitri has reigned for ten years, a period marked by his unwavering commitment to maintaining peace and order within the kingdom. However, his rule has also been characterized by a certain coldness and aloofness, a consequence of his solitary existence without a mate.
The lack of a mate has cast a shadow over Dimitri’s reign, leading some to question his strength and leadership. He has grown accustomed to the solitude, building walls around his heart to protect himself from further emotional vulnerability. His demeanor is often stern and unyielding, a facade that masks a deep yearning for connection and love. He is a man of few words, his thoughts and emotions carefully guarded, leaving those around him to decipher the true depth of his character.
Dimitri’s encounter with Aarya Bedi, a young werewolf who defies his expectations, becomes a turning point in his life. Her vibrant spirit and unexpected resilience challenge his carefully constructed defenses, forcing him to confront his own vulnerabilities and embrace the possibility of love.
Aarya Bedi⁚ The Reluctant Queen
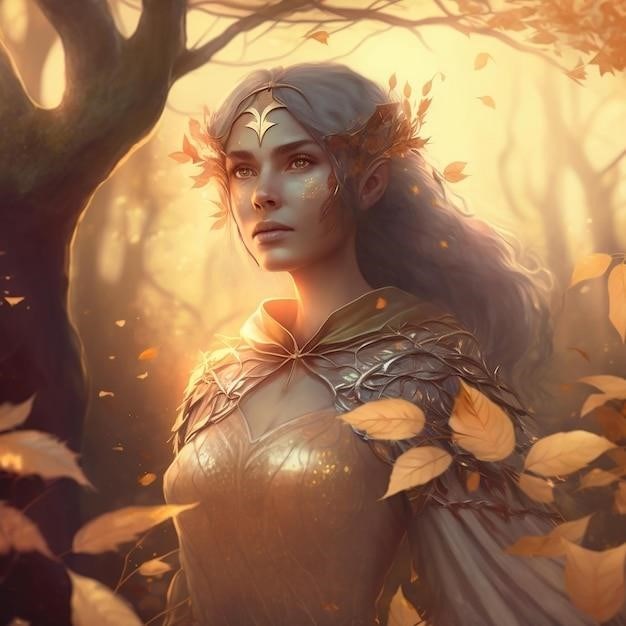
Aarya Bedi is a spirited and independent werewolf, living a comfortable life with her family. She is a young woman who values her freedom and independence, embracing her heritage as a werewolf with pride. Her life takes an unexpected turn when she is thrust into the role of Queen, a position she never sought or desired. Aarya’s initial reaction is one of apprehension and resistance. She is overwhelmed by the weight of responsibility and the sudden shift in her life, struggling to reconcile her desire for a simple life with the demands of her new position.
Aarya’s reluctance to embrace her role stems from a past heartbreak, leaving her wary of the complexities of love and commitment. She is hesitant to trust and open her heart to another, especially after experiencing the pain of a broken relationship. Her initial interactions with Adonis, the Lycan King who is destined to be her mate, are marked by tension and uncertainty. She finds herself drawn to his strength and charisma, but her past experiences make her hesitant to fully commit to a relationship.
Despite her reservations, Aarya possesses a strong sense of duty and compassion. She is determined to fulfill her responsibilities as Queen, even if it means sacrificing her own desires. Her journey as Queen is one of personal growth and self-discovery, as she learns to navigate the complexities of her new role and find her own strength amidst the challenges she faces.
The Lycan Ball
The Lycan Ball is a significant event in the world of The Lycans Queen, serving as a grand gathering for the kingdom’s various packs and a celebration of the Lycan culture. It is a time for festivity, romance, and political maneuvering, as packs from across the realm converge upon the palace. The ball is a crucial opportunity for Lycans to connect with potential mates, solidify alliances, and showcase their strength and power.
The atmosphere at the Lycan Ball is electrifying, filled with music, dancing, and elaborate displays of wealth and prestige. The palace is adorned in dazzling decorations, and guests dress in their finest attire, emphasizing their status and belonging to their respective packs; The event is a display of the kingdom’s opulence and grandeur, showcasing the Lycans’ dominance over humans and werewolves.
For Aarya, the Lycan Ball represents a daunting challenge. She is apprehensive about attending, her initial reluctance stemming from her aversion to large gatherings and her fear of the powerful Lycans. However, the ball also presents an opportunity for her to navigate her new role as Queen and gain a deeper understanding of the kingdom’s dynamics. The event serves as a critical turning point in her journey, as she confronts her fears and begins to embrace her destiny.
The Lycan Mate
The concept of a Lycan mate is a central theme in The Lycans Queen, representing a powerful and sacred bond that transcends the boundaries of species. Lycans, known for their strength, power, and longevity, are bound by a unique and unbreakable connection to their mates. This bond is not merely a romantic partnership; it is a spiritual and physical connection that defines a Lycan’s life.
Finding a mate is a significant event for a Lycan, often accompanied by a sense of destiny and an overwhelming sense of belonging. The bond between a Lycan and their mate is said to be unbreakable, with the loss of a mate resulting in profound grief and even a potential for destructive rage. This deep connection makes a Lycan mate a precious and cherished entity, a testament to the intensity and power of their bond.
For Aarya, the concept of a Lycan mate is initially a source of apprehension. She is a werewolf, and her understanding of mating is different from that of the Lycans. She is initially hesitant to accept her role as Adonis’ mate, struggling with the implications of the bond and the immense responsibility that comes with it. Her journey as a Lycan mate is one of self-discovery, as she learns to understand and embrace the unique nature of her connection to Adonis.
The History of Humans, Werewolves, and Lycans
The world of The Lycans Queen is steeped in a rich history that intertwines the fates of humans, werewolves, and Lycans. These three distinct species, each with unique abilities and a shared history, have coexisted for centuries, forming a delicate balance of power and understanding. The novel delves into the ancient origins of these species, exploring the events that shaped their relationships and led to the current state of harmony.
The history of humans, werewolves, and Lycans is a tapestry woven with tales of ancient battles, alliances forged in the face of adversity, and the enduring legacy of a shared past. The Lycans, with their superior strength and power, emerged as the dominant force, ruling over the werewolves and humans. The werewolves, known for their agility and resilience, formed a strong alliance with the Lycans, their combined power ensuring peace and stability. Humans, despite their physical limitations, played a vital role in this complex ecosystem, their ingenuity and knowledge contributing to the overall balance.
The novel highlights the importance of understanding this shared history, emphasizing the significance of the alliances and agreements that have sustained peace for generations. Aarya, as a werewolf, is deeply connected to this history, her understanding of the past shaping her perspective on the current state of the world and the role she plays in it. The history of humans, werewolves, and Lycans serves as a backdrop for the present, providing context for the characters’ actions and the challenges they face.
The Lycan Ball⁚ A Time for Romance and Politics
The Lycan Ball, a grand spectacle held annually within the Lycan kingdom, serves as a platform for both romance and political maneuvering. This elaborate event, attended by representatives from every pack, offers an opportunity for individuals to find their destined mates, while simultaneously allowing the Lycan King to solidify his power and maintain peace across the realm. The Ball, a carefully choreographed dance of social interaction and strategic alliances, embodies the delicate balance between personal desires and political necessity.
For those seeking love, the Lycan Ball presents a unique opportunity to connect with potential mates. The atmosphere, charged with anticipation and the promise of finding one’s destined partner, encourages individuals to step outside their comfort zones and embrace the possibility of love. The Ball’s romantic element, however, is intertwined with political considerations, as the King seeks to ensure that the event fosters stability and harmony within the kingdom. The selection of attendees, the carefully orchestrated pairings, and the King’s presence all contribute to this delicate balancing act.
The Lycan Ball, therefore, represents a complex tapestry of social interaction and political maneuvering. It is a stage where individuals can pursue their personal desires while simultaneously contributing to the overall well-being of the kingdom. The novel explores this intricate dynamic, highlighting the challenges and opportunities that arise when romance and politics collide within the grand setting of the Lycan Ball.
The Importance of the Lycan Ball
The Lycan Ball holds immense significance within the world of The Lycans Queen, serving as a cornerstone of social and political stability within the Lycan kingdom. This grand event, held annually, plays a crucial role in maintaining harmony between the diverse packs that inhabit the realm. It is a time for representatives from each pack to gather, fostering a sense of unity and shared purpose. The Ball transcends its role as a mere social gathering, acting as a vital mechanism for maintaining peace and ensuring the continuity of the Lycan lineage.
The Lycan Ball serves as a platform for the King to solidify his authority and demonstrate his commitment to the well-being of the kingdom. By hosting this grand event, the King showcases his power and influence, reinforcing his position as the supreme leader. The Ball also provides a platform for the King to address pressing issues, communicate his vision for the future, and strengthen ties with the various packs. This event, therefore, acts as a powerful tool for maintaining political stability and ensuring the smooth functioning of the Lycan kingdom.
Beyond its political significance, the Lycan Ball holds deep cultural importance. It is a celebration of the Lycan way of life, a time for individuals to connect with their heritage and celebrate their shared identity. The Ball fosters a sense of community and belonging, reminding everyone of their place within the larger Lycan society. This grand event, therefore, serves as a powerful reminder of the rich cultural tapestry that binds the Lycan kingdom together.