Embark on a rewarding journey through Azeroth’s revamped landscapes, uncovering valuable ores and resources!
This guide details efficient mining strategies within Cataclysm Classic,
leveraging new zones and tools for optimal gains, and maximizing your profits.
Cataclysm Classic dramatically reshaped Azeroth, and mining is no exception! The upheaval introduced new ore veins, zones, and challenges for prospectors. This isn’t your father’s mining guide; the Cataclysm’s impact necessitates a fresh approach to resource gathering. Expect altered landscapes, requiring adaptation to new routes and efficient travel methods.
The introduction of Elemental Rune Dungeons and the shifting faction dynamics also influence mining opportunities. Understanding these changes is crucial for success. Furthermore, the game’s world has been altered, impacting travel and accessibility to previously known mining locations. Prepare to explore revamped zones like Mount Hyjal, Deepholm, and Uldum, each offering unique ore deposits and potential rewards. Mastering these changes will unlock substantial profits and contribute to your character’s progression.
Mining Skill Levels and Requirements
Achieving maximum mining skill (525) in Cataclysm Classic requires dedication and consistent effort. Starting at 1, you’ll progress through familiar levels, but the ore types and skill gains differ significantly from previous expansions. Reaching 375 skill allows you to mine Cobalt Ore, a crucial stepping stone. Saronite Ore becomes available at 450, and the coveted Titanium Ore requires a skill of 525.
There are no specific level requirements to begin mining, but higher-level zones containing valuable ores are naturally guarded by stronger creatures. A character level of 80 is recommended for efficient mining in Cataclysm zones. Remember that skill increases become progressively slower, demanding more time and ore to reach the next level. Utilizing mining tools and efficiency bonuses is vital for faster progression.
Best Zones for Mining in Cataclysm
Cataclysm dramatically reshaped Azeroth, creating new hotspots for mining. Mount Hyjal, Deepholm, and Uldum stand out as prime locations. Mount Hyjal offers abundant Cobalt and Saronite, though competition can be fierce. Deepholm is renowned for its rich Titanium deposits, making it a high-demand, often crowded zone; Uldum provides a more relaxed environment for Saronite and Titanium gathering, with fewer players contesting nodes.
The revamped zones of the Eastern Kingdoms and Kalimdor also contain valuable ores, but generally in lower concentrations. Focusing on these three primary zones – Hyjal, Deepholm, and Uldum – will yield the most efficient results. Remember to scout for less-traveled routes within these zones to minimize competition and maximize your mining output.
Mount Hyjal Mining Locations
Mount Hyjal’s mining hotspots are concentrated around the revamped landscape, particularly near the Nexus and around the fringes of the firelands. Look for Cobalt and Saronite nodes scattered throughout the forested areas and along the slopes leading towards the Molten Front. The areas surrounding the Spirit Lodge often yield a consistent supply of ores, though they can be heavily contested;
Circling the mountain’s perimeter offers a good route, avoiding the densest concentrations of players. Be mindful of the wildlife; hostile creatures can interrupt your mining. Prioritize areas slightly off the beaten path for a better chance of finding unclaimed nodes. Remember to utilize flight paths to quickly traverse the expansive terrain and optimize your mining route.
Deepholm Mining Locations
Deepholm presents a unique mining experience due to its cavernous environment and abundance of Saronite and, increasingly, Titanium ore. Focus your efforts around the Ring of Echoes and the areas connecting to the Stonecore dungeon. The twisting tunnels offer numerous nodes, but navigating them efficiently is key.
Be prepared for competition, as Deepholm is a popular leveling and mining destination. Explore the outer edges of the zone, particularly the pathways leading towards the various quest hubs, for less crowded nodes. Utilize the zone’s verticality to your advantage, searching higher and lower levels for hidden ore deposits. Watch out for the local wildlife, as they can be aggressive!
Uldum Mining Locations
Uldum, with its Egyptian theme, offers a distinct mining experience. While not as densely packed with nodes as Deepholm, Uldum provides a relatively peaceful environment for gathering Titanium ore. Concentrate your mining around the Ramkahen ruins and the outskirts of the Lost City of the Tol’vir.
The open areas of Uldum allow for easier navigation, but also increased visibility to other players. Look for nodes nestled amongst the dunes and near the ancient structures. Be mindful of the patrolling Tol’vir, as they can interrupt your mining. Utilizing a flying mount can significantly speed up travel between nodes, maximizing your efficiency in this expansive zone. Expect moderate competition for resources.
Essential Mining Tools and Equipment
Success in Cataclysm mining hinges on having the right tools. A Mining Pick is, of course, fundamental – ensure yours is upgraded to the highest quality available from a vendor or crafted. Consider investing in a Prospector’s Tool; while not strictly required, it significantly increases your chances of finding rare gems when prospecting ore.
Enchanting your pick with enchantments like Black Diamond Mining can further boost your mining skill. A sturdy mount is crucial for traversing the vast zones, and a flying mount is invaluable for reaching remote nodes. Finally, don’t underestimate the value of bags – larger bags mean fewer trips back to town to offload your ore, increasing overall efficiency.
Ore Types in Cataclysm
Cataclysm introduced a shift in ore distribution and types. Cobalt Ore remains prevalent in lower-level zones, serving as a stepping stone for new miners. Saronite Ore, found in Northrend, continues to be valuable, but Titanium Ore becomes the primary focus for endgame crafting. This ore is scattered throughout the revamped zones of Kalimdor and the Eastern Kingdoms.
Expect increased competition for Titanium nodes, as it’s essential for high-end gear. Additionally, keep an eye out for Adamantite Ore, still useful for certain recipes. Understanding the vein density and spawn rates in different zones is key to maximizing your yield. Remember to prospect your ore – you never know what gems you might uncover!
Cobalt Ore

Cobalt Ore serves as the foundational material for aspiring miners in Cataclysm Classic. Widely distributed across Kalimdor and the Eastern Kingdoms, it’s readily accessible in zones like Elwynn Forest, Dun Morogh, and Westfall. While not as lucrative as later-game ores, Cobalt is crucial for leveling your mining skill and crafting early-tier items.
Expect a relatively high spawn rate, making it easy to gather substantial quantities. It’s primarily used in blacksmithing, engineering, and jewelcrafting for basic components. Don’t underestimate its value – even seasoned miners occasionally return to farm Cobalt for specific recipes or to assist lower-level characters. Efficient routes focusing on densely populated starting areas are recommended.
Saronite Ore
Saronite Ore represents a significant step up from Cobalt, becoming available at mining skill level 275. Predominantly found in Northrend zones, its acquisition in Cataclysm Classic requires venturing into previously explored, yet now relevant, territories. Key locations include Icecrown, Storm Peaks, and Grizzly Hills, though spawn rates can be competitive.
Saronite is essential for crafting higher-level gear and components, particularly for blacksmithing and jewelcrafting. It’s also a key ingredient in creating powerful enchantments. Prospecting Saronite yields a chance for rare gems, adding to its value. Players should prioritize efficient routes and consider utilizing mining-specific enchants to maximize their yield and minimize travel time between nodes.
Titanium Ore
Titanium Ore stands as the pinnacle of mining in Cataclysm Classic, demanding a substantial mining skill of 350 to harvest. This rare ore is primarily located within the newly reshaped zones of Mount Hyjal, Deepholm, and Uldum, presenting unique challenges and opportunities for miners. Spawn rates are notably lower compared to previous ore types, intensifying competition amongst players.

Titanium is crucial for crafting the most advanced gear and items available in the expansion, making it highly sought after. Prospecting Titanium offers the highest chance of obtaining epic-quality gems, significantly boosting its market value. Efficient mining requires strategic route planning, utilizing flight paths effectively, and potentially employing tools or enchants to increase yield and speed.
Mining Efficiency Tips and Tricks
Maximize your mining gains in Cataclysm Classic with these essential strategies! Utilize mining routes optimized for ore density, prioritizing zones like Deepholm and Uldum. Consider investing in enchants that boost mining skill, increasing your chance to find rarer ores like Titanium. Flight paths are invaluable for swift travel between nodes; plan routes accordingly.
Multiboxing, while requiring additional accounts, can significantly increase mining output. Regularly check auction house prices to identify profitable ores and gems. Prospecting efficiently is key – focus on ores with higher gem yield potential. Remember to utilize add-ons that track node locations and respawn timers for a competitive edge. Stay vigilant for competing miners!
Prospecting and Jewelcrafting Synergies
Synergize your mining and jewelcrafting skills for substantial profits in Cataclysm Classic! Prospecting ores yields gems crucial for enchanting and jewelcrafting, creating a self-sufficient income stream. Focus on prospecting Saronite and Titanium ores, as they offer the highest potential for valuable gems like Dragon’s Eyes and Everbrights.
Jewelcrafting allows you to cut these gems into desirable stats for gear, catering to player demand. Mastering both professions provides control over the entire production chain, minimizing reliance on the auction house; Consider specializing in specific gem cuts to dominate a niche market. Regularly monitor auction house trends to identify profitable gem combinations and adjust your prospecting efforts accordingly.

Cataclysm Mining Daily Quests
Maximize your daily rewards by completing mining-related quests in Cataclysm Classic! While specific daily mining quests are limited compared to other professions, opportunities arise through zone storylines and faction offerings. Keep an eye out for quests in Mount Hyjal, Deepholm, and Uldum that require ore collection as part of their objectives.
These quests often provide valuable rewards like gold, experience, and reputation with key factions. Prioritize quests that align with your current mining location to efficiently combine quest completion with ore gathering. Remember to check quest hubs regularly, as new daily quests may become available. Completing these quests consistently contributes to overall progression and profitability.
Elemental Rune Dungeons and Mining
Leverage the new Elemental Rune Dungeons introduced in Cataclysm Classic for a unique mining opportunity! While not directly focused on mining, these dungeons, particularly in Protocol Twilight mode, offer a concentrated area for players to gather. The increased player density within these instances can lead to discovering previously overlooked ore veins.
Furthermore, the dungeons themselves often require materials obtainable through mining for upgrades or crafting related to the runes. Consider running these dungeons regularly, not only for the rune rewards but also as a supplementary source of ore. Remember to be mindful of other players and avoid excessive competition for limited resources within the dungeon environment.
Faction Impacts on Mining
Cataclysm significantly altered faction dynamics, impacting mining accessibility in certain zones. While mining itself isn’t strictly faction-locked, the ease of access and safety can vary greatly. Horde players will find more secure mining opportunities in areas like Mount Hyjal, while Alliance players benefit from safer zones in Deepholm and Uldum.
Be aware of potential PvP encounters when mining in contested territories, especially near flight paths or resource nodes close to enemy faction hubs. Utilizing faction-specific portals and travel options can minimize travel time and exposure to hostile players. Consider grouping with fellow faction members for increased safety and efficiency when venturing into contested zones for valuable ores.
Portal Usage for Efficient Mining Routes
Cataclysm introduced and revamped numerous portals, drastically improving travel times for miners. Utilizing these strategically is crucial for maximizing efficiency. The Dalaran portals, though originating from The Burning Crusade, remain valuable for accessing key zones. Remember that the removal of some older portals necessitates utilizing the new 8.1.5 routes for optimal travel.
Focus on establishing routes that leverage portal networks to quickly move between mining hotspots. For example, utilizing portals to reach Mount Hyjal or Deepholm can significantly reduce travel time compared to flying. Consider the faction-specific portals available, ensuring swift access to resource-rich areas within your territory. Efficient portal usage translates directly into increased ore gathering and profitability.
Character Transfers and Mining
Considering a character transfer specifically for mining in Cataclysm Classic? It’s a viable strategy, but requires careful planning. The availability of character transfer and faction change services, as noted on April 15th, 2025, allows for relocation to servers with more favorable mining conditions or lower competition. However, weigh the cost of the transfer against the potential gains.
Research server populations and the activity of mining professions before committing. A server with a lower population might offer easier access to nodes, but could also indicate a weaker economy. Conversely, a highly populated server may have intense competition, but also better prices for your ores. Ultimately, a well-timed transfer can significantly boost your mining profits.
Midsummer Fire Festival and Mining
Don’t let the festivities distract you from profitable mining opportunities during the Midsummer Fire Festival! This annual event, running from June 21st to July 5th, presents a unique window for combining holiday activities with resource gathering. While enjoying faction-specific celebrations, remember that ore nodes remain accessible throughout Azeroth.

Consider mining in zones near festival hubs, allowing you to quickly switch between quests and resource collection. The increased player activity during the festival can sometimes lead to faster ore respawn rates due to accidental bumping. However, be prepared for increased competition from other players also taking advantage of the event. Prioritize efficient routes and utilize mining tools to maximize your yield while embracing the summer spirit!
Weapon Enchantments and Mining Materials
A surprising synergy exists between weapon enchantment demand and mining! Cataclysm introduced many proc-based enchantments, driving up the need for materials sourced directly from mining. While Mighty Agility remains a passive boost, the prevalence of proc enchants means consistent demand for gems and enchanting materials.

Specifically, ores like Cobalt, Saronite, and Titanium are crucial for crafting the necessary bars used in enchanting recipes. Focusing on these ores during peak enchantment crafting times – often after raid progression – can yield substantial profits. Remember that prospecting these ores also provides gems used directly in enchantments, creating a dual revenue stream. Keep an eye on the Auction House to identify which enchantments are trending and adjust your mining focus accordingly!
Cataclysm: Dark Days Ahead ‒ Mining Overview (External Game)
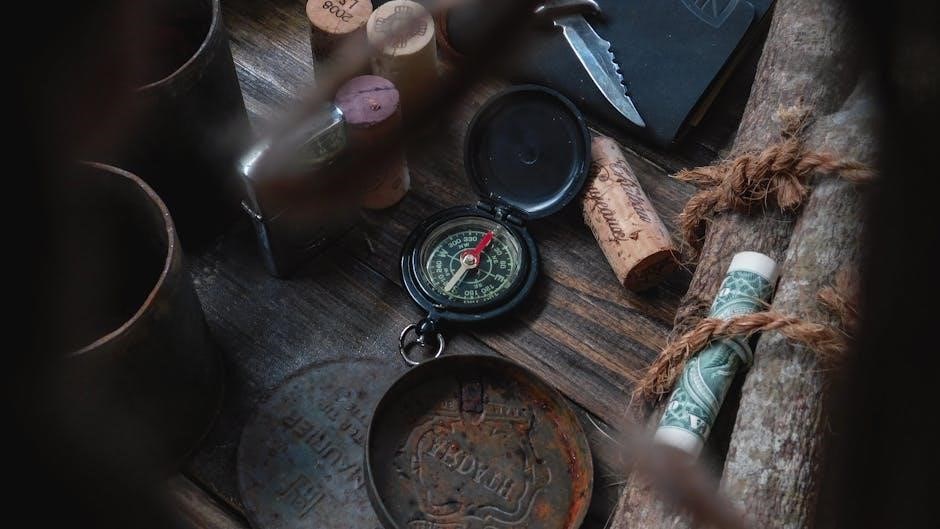
Interestingly, the name “Cataclysm” also applies to a separate, post-apocalyptic survival roguelike game, Cataclysm: Dark Days Ahead (CataDDA). While vastly different from WoW, mining is a core mechanic within this external game. Players must locate and excavate resources from underground, facing dangers like cave-ins and hostile creatures.
Unlike WoW’s structured zones, CataDDA’s mining is more exploratory and procedural. Players can search for items like tools (picks) and furniture (tables) while delving into the earth. The game emphasizes resource management and crafting, making mined materials essential for survival. Though unrelated to Cataclysm Classic, the shared name highlights the theme of overcoming a devastating event and rebuilding, albeit in drastically different contexts.
Resources for Cataclysm Classic Mining
Numerous online resources can significantly enhance your Cataclysm Classic mining experience. WoWhead provides comprehensive databases detailing ore locations, drop rates, and associated quests. Icy Veins offers detailed class guides, often including mining-specific tips for maximizing efficiency. YouTube channels dedicated to WoW Classic frequently feature mining route videos and tutorials.
For real-time information and community discussion, explore the WoW Classic subreddit and dedicated Discord servers. These platforms allow players to share optimal routes, report ore spawn changes, and coordinate mining runs. Additionally, websites tracking auction house prices can help identify profitable ores to prioritize. Remember to cross-reference information and adapt strategies based on your server’s economy.

Future Updates and Mining Changes (PTR Notes)
Currently, the Cataclysm Classic PTR (Public Test Realm) is actively testing updates, including adjustments to Elemental Rune Dungeons which may indirectly impact mining routes due to player traffic. February 7, 2025 PTR notes highlight ongoing testing of these dungeons, potentially altering zone accessibility. Blizzard is also evaluating feedback on the third Dragon Soul raid, though direct mining implications are currently unclear.
Historically, PTR notes often reveal changes to ore spawn rates or the introduction of new mining-related quests. Players should closely monitor official World of Warcraft forums and PTR patch notes for announcements regarding mining adjustments. Expect potential tweaks to ore distribution based on player feedback and data analysis, aiming for a balanced and engaging mining experience throughout Cataclysm Classic’s lifecycle.