Vienna Sheet Music PDF: A Comprehensive Guide (Updated 02/26/2026)
Finding readily available Vienna sheet music in PDF format is now remarkably easy, thanks to online platforms like MuseScore.com, offering diverse arrangements for various instruments.
What is Vienna by Billy Joel?
“Vienna”, released in 1977 on Billy Joel’s album The Stranger, is a poignant ballad exploring themes of slowing down, appreciating life’s journey, and avoiding the pitfalls of rushing towards an undefined future. The song isn’t about the city of Vienna itself, but rather serves as a metaphorical destination representing a more relaxed and fulfilling way of life.

Musically, “Vienna” is characterized by its gentle piano melody, subtle orchestral arrangements, and Joel’s emotive vocals. It’s a departure from some of his more upbeat, rock-oriented songs, showcasing his versatility as a songwriter and performer. The song’s enduring popularity has led to numerous arrangements and transcriptions, making Vienna sheet music highly sought after by musicians of all levels.
The availability of Vienna sheet music in PDF format allows pianists, guitarists, and other instrumentalists to learn and perform this classic song. Arrangements range from solo piano to mixed ensemble versions, catering to diverse musical preferences and skill sets; The song’s lyrical depth and melodic beauty continue to resonate with audiences today, solidifying its place as a timeless masterpiece.
The Popularity of Vienna Sheet Music
The enduring appeal of Billy Joel’s “Vienna” directly fuels the high demand for its sheet music, particularly in accessible PDF format. Musicians consistently seek arrangements to learn and perform this emotionally resonant piece, contributing to its widespread circulation online. MuseScore.com, a prominent platform, showcases over a thousand digital versions, demonstrating significant user interest.
This popularity isn’t limited to piano; arrangements exist for guitar, flute, saxophone, and mixed ensembles, broadening its reach. The song’s relatively moderate difficulty makes it approachable for intermediate players, while its lyrical depth and harmonic richness offer challenges for more advanced musicians.
The convenience of downloadable Vienna sheet music PDFs allows for instant access and easy printing, further boosting its popularity. Whether for practice, performance, or simply enjoying the song on an instrument, the availability of these resources ensures “Vienna” continues to be a beloved piece for generations of musicians.
Where to Find Vienna Sheet Music in PDF Format
Numerous online repositories offer Vienna sheet music PDFs, with MuseScore.com being a leading source, alongside other platforms hosting arrangements for diverse instruments.
MuseScore.com: A Primary Source
MuseScore.com stands out as a premier destination for accessing Vienna sheet music in PDF format. The platform boasts an extensive collection, offering numerous arrangements created by a vibrant community of musicians and composers. Users can readily download and print free sheet music for Vienna by Billy Joel, catering to various instruments including piano, guitar, flute, saxophone, and more.
The website’s search functionality allows for easy filtering, enabling musicians to pinpoint specific arrangements based on their needs – whether it’s a piano solo, a mixed ensemble version featuring saxophone, trumpet, and guitar, or a simplified arrangement with chords. Arrangements are frequently updated, with recent uploads dating back to February 12, 2025, and May 14, 2024, demonstrating ongoing contributions from the community.
Beyond free options, MuseScore.com also provides access to premium sheet music. The platform supports both PDF and MIDI formats, offering flexibility for practice and performance. It’s a dynamic hub for musicians seeking to learn, practice, and enjoy Billy Joel’s iconic song.
Other Online Sheet Music Repositories
While MuseScore.com is a leading resource, several other online repositories offer Vienna sheet music in PDF format, though their collections may vary in scope and quality. A diligent search across the internet reveals options beyond the primary platforms, potentially uncovering unique arrangements or transcriptions not found elsewhere.
However, users should exercise caution when utilizing less-established websites. Verifying the accuracy of the sheet music is crucial, as transcriptions can sometimes contain errors. Always cross-reference with reliable sources when possible. Furthermore, be mindful of copyright restrictions and ensure the source offers legally permissible downloads.
Exploring forums dedicated to music and piano playing can also yield valuable leads. Musicians often share links to sheet music they’ve discovered or created. Remember to prioritize reputable sources and always respect copyright laws when accessing and utilizing Billy Joel’s music.
Types of Vienna Sheet Music Available

Numerous arrangements of Vienna exist in PDF format, including piano solos, accompaniment versions, mixed ensemble scores, and options featuring chord symbols for versatile playing.
Piano Solo Arrangements
Piano solo arrangements of “Vienna” by Billy Joel are exceptionally popular and widely accessible in PDF format. These versions cater to pianists of varying skill levels, offering a direct interpretation of the song’s beautiful melody and harmonic structure.
MuseScore.com hosts a significant collection of these arrangements, ranging from simplified versions for beginners to more complex, technically demanding pieces for advanced players. Many arrangements include detailed fingerings and dynamic markings to aid in performance.
Notably, arrangements by users like genevievebatm1 provide readily downloadable PDFs, offering a convenient way to learn and play the song. These solo arrangements often focus on faithfully recreating the original piano part, allowing pianists to experience the song’s emotional depth and lyrical quality.
Furthermore, some arrangements include chord symbols integrated into the sheet music, which can be beneficial for improvisation or accompaniment purposes. The availability of these diverse piano solo arrangements ensures that musicians of all abilities can enjoy playing “Vienna” on the piano.
Piano Accompaniment Versions
For vocalists or instrumentalists desiring piano support, “Vienna” sheet music in PDF format frequently includes piano accompaniment versions. These arrangements are designed for a soloist to perform with piano backing, rather than a standalone piano piece.
MuseScore.com provides options specifically tailored for this purpose. Davidhelmut’s arrangement, for example, offers a dedicated piano accompaniment part in a downloadable PDF. These versions typically feature the melody line clearly marked, alongside the corresponding piano chords and rhythmic patterns.
These arrangements are particularly useful for singers practicing their vocal performance or for instrumentalists looking to add harmonic depth to their rendition of the song. The piano accompaniment often mirrors the original song’s instrumentation, providing a rich and supportive harmonic foundation.
Consequently, these PDFs are valuable resources for rehearsals, performances, and music education, allowing musicians to collaborate and experience the full emotional impact of “Vienna” together. They bridge the gap between solo performance and ensemble playing.
Mixed Ensemble Arrangements (Piano, Saxophone, Trumpet, Guitar)
Beyond solo and accompaniment options, “Vienna” sheet music PDFs also cater to mixed ensembles, offering arrangements for combinations like piano, saxophone, trumpet, and guitar. These versions allow for a more collaborative and dynamic musical experience.
MuseScore.com hosts several such arrangements, notably anthybalfo’s adaptation. This particular PDF includes parts for piano, alto saxophone, B-flat trumpet, and guitar, enabling a small group to perform a fuller rendition of the song. The arrangement is designed to distribute the melodic and harmonic elements across the different instruments.
These ensemble arrangements often feature simplified parts to accommodate varying skill levels, making them accessible to both amateur and experienced musicians. They provide a unique opportunity to explore the song’s harmonic and melodic textures from multiple perspectives.
Ultimately, these mixed ensemble PDFs are ideal for jam sessions, school bands, or any group seeking a fun and engaging way to perform “Vienna” together, fostering musical camaraderie and creativity.
Sheet Music with Chords
For musicians who enjoy accompanying themselves or improvising, “Vienna” sheet music PDFs with chord symbols are readily available. These versions provide the harmonic foundation of the song, allowing for flexibility in performance and arrangement.
MuseScore.com features arrangements specifically designed for piano solo with chords, created by users like genevievebatm1. These PDFs display the melody line alongside the corresponding chord changes, enabling pianists to play the song with a fuller sound and explore different voicing options.
The inclusion of chords is particularly beneficial for singers who wish to accompany themselves, or for guitarists who want to adapt the song to their instrument. It also facilitates improvisation and allows musicians to create their own unique interpretations of the piece.
These chorded arrangements simplify the process of learning and performing “Vienna,” making it accessible to a wider range of musicians and encouraging creative exploration of Billy Joel’s classic song.

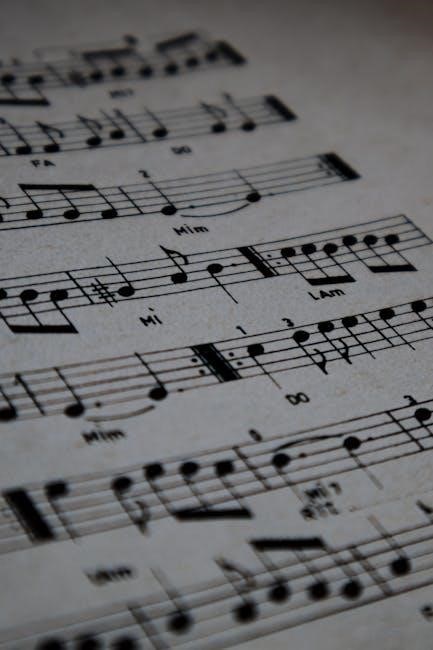
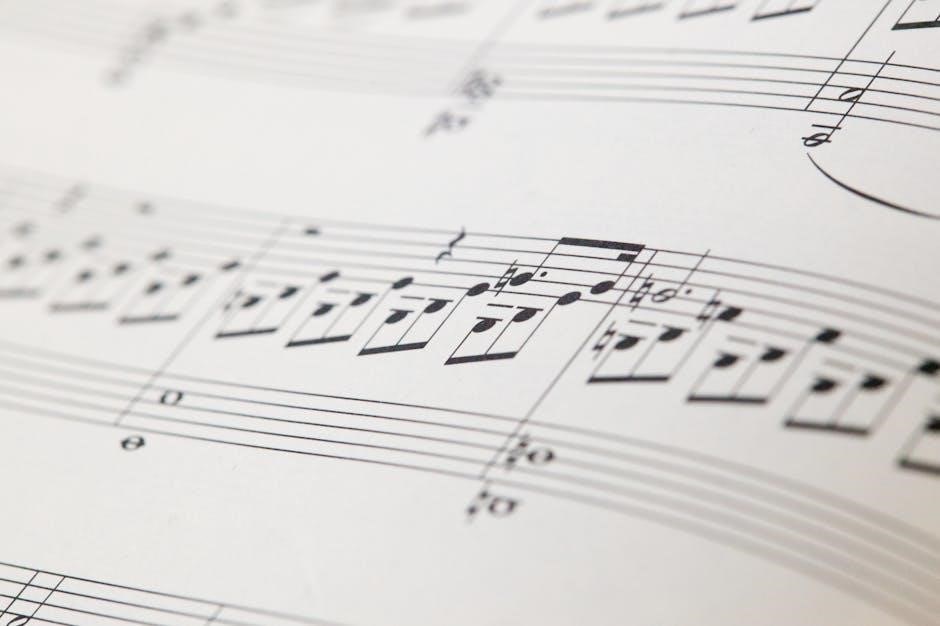
Understanding Sheet Music Notation for Vienna
Decoding the sheet music requires recognizing key signatures, time signatures, tempo markings, and dynamic indications, all crucial for accurately interpreting Billy Joel’s composition.
Key Signature and Time Signature
Analyzing the Vienna sheet music reveals the foundational elements of its musical structure, beginning with the key signature. Determining the key – often F major or a closely related key depending on the arrangement – is paramount for understanding the harmonic context of the piece. This dictates which notes are sharpened or flattened throughout the composition, influencing the overall mood and character.
Equally important is the time signature. Vienna predominantly utilizes a 4/4 time signature, providing a common and recognizable rhythmic framework. This means there are four beats in each measure, with a quarter note receiving one beat. However, some arrangements might introduce variations or subtle rhythmic complexities. Recognizing these nuances is vital for accurate performance.
Understanding how the key and time signature interact is crucial. The key establishes the tonal center, while the time signature governs the rhythmic pulse. Together, they form the bedrock upon which the melody, harmony, and dynamics are built, allowing musicians to interpret and convey the emotional depth of Billy Joel’s masterpiece.
Tempo Markings and Dynamics
Examining the Vienna sheet music PDF reveals crucial performance instructions through tempo and dynamic markings. Typically, the piece begins with a moderate tempo, often indicated as around 68-72 beats per minute (BPM), though interpretations can vary. This establishes a reflective and somewhat melancholic mood, characteristic of the song’s lyrical content.
Dynamic markings are equally vital. Vienna features a wide dynamic range, moving from quiet passages (piano or mp) to more powerful, emotionally charged sections (forte or mf). Careful attention to these markings is essential for conveying the song’s emotional arc and building dramatic tension.
Subtle nuances, such as crescendos and diminuendos, are also present, guiding the performer to shape phrases and create a more expressive interpretation. Mastering these dynamic shifts, alongside the tempo, allows musicians to truly capture the heart and soul of Billy Joel’s composition, bringing the sheet music to life.
Chord Symbols and Voicings
Analyzing the Vienna sheet music PDF reveals a harmonic structure built upon relatively straightforward, yet emotionally resonant, chord progressions. Common chord symbols encountered include variations of A major, D major, E major, and B minor, forming the foundation of the song’s melancholic beauty.
Voicings, however, are where nuance emerges. While basic chord shapes are provided, skilled pianists often employ richer voicings – distributing the notes of the chord across a wider range – to create a fuller, more textured sound. The sheet music may not explicitly detail these voicings, leaving room for individual interpretation and creativity.
Understanding inversions – altering the bass note of a chord – is also beneficial. These inversions contribute to smoother transitions between chords and enhance the harmonic flow. Exploring different voicings and inversions allows musicians to personalize their performance and add depth to this iconic Billy Joel ballad.

Downloading and Printing Vienna Sheet Music PDFs
MuseScore facilitates straightforward PDF downloads, enabling musicians to quickly access Vienna sheet music. Printing requires consideration of paper size and quality for optimal readability.
PDF Download Process on MuseScore
MuseScore.com streamlines the process of obtaining Vienna sheet music in PDF format. Upon locating the desired arrangement – be it for piano solo, mixed ensemble, or another instrumentation – users simply navigate to the score’s page. A prominent “Download” button, typically located near the score preview, initiates the download.
Users may be prompted to create a free MuseScore account or log in if they haven’t already. This account allows for tracking downloads and contributing to the community. Selecting the PDF option from the download menu ensures the score is saved in a universally accessible format.
The download is generally quick, dependent on internet speed and file size. Once completed, the PDF file is stored locally on your device, ready for viewing, printing, or importing into music notation software. MuseScore also offers a MIDI download option, but for printed scores, PDF is the preferred choice. The platform’s intuitive interface makes accessing and downloading sheet music remarkably user-friendly, catering to musicians of all levels.
Print Quality and Paper Size Considerations
When printing Vienna sheet music PDFs downloaded from platforms like MuseScore, several factors impact the final output quality. Firstly, ensure your printer settings are configured for optimal resolution – at least 300 DPI is recommended for clear notation. Selecting the correct paper size is crucial; standard letter size (8.5 x 11 inches) is common, but some scores may be formatted for A4.
Previewing the print layout before committing is essential to avoid cropping or distortion of the musical notation. Consider using heavier-weight paper stock for durability, especially for frequently used scores.
Black and white printing is generally sufficient, but color can enhance readability for scores with highlighted sections or complex arrangements. Experiment with different printer settings to achieve the desired balance between print quality and ink consumption. Properly adjusted settings will ensure a legible and professional-looking printed copy of your Vienna sheet music.

Legal Considerations and Copyright
Billy Joel’s music is protected by copyright, influencing sheet music availability. Free PDFs often exist, but paid, legally licensed versions ensure composer compensation and adherence to law.
Copyright Status of Billy Joel’s Music
Understanding the copyright status of Billy Joel’s music, including “Vienna,” is crucial when seeking sheet music PDFs. As the composer and lyricist, Billy Joel retains copyright ownership of his original musical works. This copyright extends to the musical composition itself, as well as the lyrics. Generally, copyright protection lasts for the life of the author plus 70 years. Therefore, accessing and utilizing sheet music of “Vienna” requires respecting these legal boundaries.
Downloading and distributing unauthorized copies of copyrighted sheet music constitutes infringement. While many websites offer free PDFs, these may not be legally obtained or licensed. Utilizing officially licensed sheet music, available through platforms like Musicnotes or Hal Leonard, ensures compliance with copyright law and supports the artist and publishers.
It’s important to note that arrangements and transcriptions of “Vienna” may also be subject to copyright, particularly if they involve significant creative alterations. Always verify the licensing terms before using or sharing any sheet music PDF to avoid potential legal issues.
Free vs. Paid Sheet Music Options
When searching for “Vienna” sheet music PDFs, you’ll encounter both free and paid options. Platforms like MuseScore.com offer a vast library of user-submitted, often free, arrangements. However, the quality and accuracy of these free versions can vary significantly. They may contain errors, incomplete sections, or simplified arrangements unsuitable for advanced players.
Paid sheet music, available from reputable sources like Musicnotes.com or directly from publishers, generally provides higher-quality, professionally transcribed arrangements. These versions are typically more accurate, complete, and often include additional features like accompaniment tracks or interactive playback.
The choice between free and paid options depends on your needs and skill level. Beginners might find free, simplified arrangements sufficient, while experienced musicians seeking accurate and detailed scores will likely benefit from investing in paid versions. Consider the legal implications as well; paid options ensure proper licensing and artist compensation.

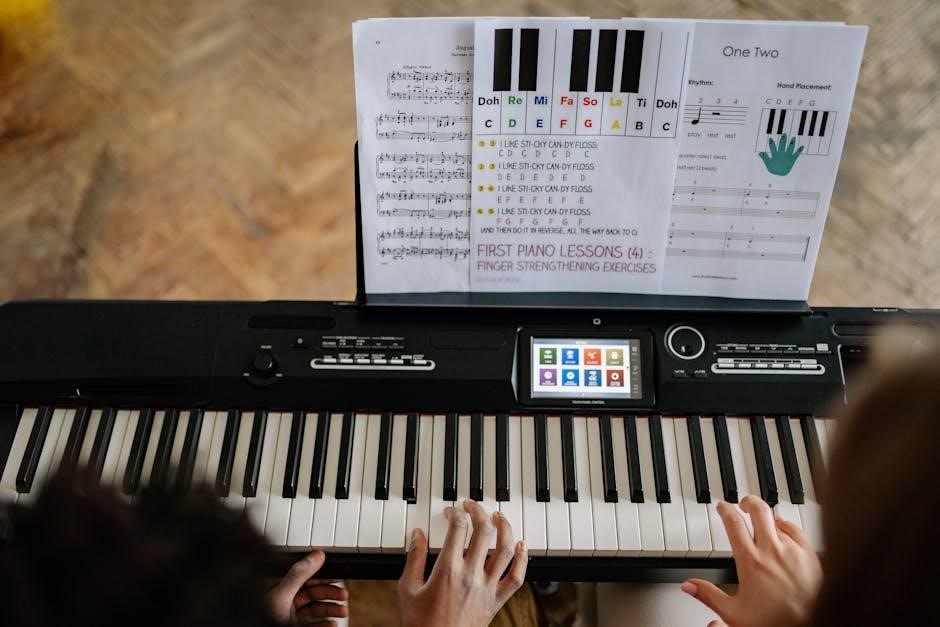
Using Vienna Sheet Music for Learning and Performance
Successfully learning and performing “Vienna” requires assessing your skill level, diligent practice, and thoughtful interpretation of Billy Joel’s emotive composition.
Skill Level and Difficulty Assessment
Determining the appropriate Vienna sheet music arrangement hinges on accurately assessing your current piano proficiency. Beginner pianists might initially struggle with the original piano solo version, finding the chord voicings and rhythmic subtleties challenging.
However, simplified arrangements, or those specifically labeled for “easy piano,” offer a more accessible starting point. Intermediate players will likely find the standard piano solo arrangement manageable, focusing on refining dynamics and phrasing.
More advanced musicians can explore the mixed ensemble arrangements, which introduce complexities related to coordination and ensemble playing. Consider the tempo and key signature; faster tempos and complex key changes increase difficulty.

Furthermore, arrangements including chord symbols demand a stronger understanding of music theory and improvisation. Carefully review a sample of the sheet music before committing to ensure it aligns with your capabilities and learning goals.
MuseScore.com often provides user ratings and comments, offering valuable insights into the perceived difficulty of each arrangement.
Tips for Practicing and Mastering the Piece
Effective practice of Vienna, utilizing your downloaded PDF sheet music, begins with slow, deliberate repetition. Isolate challenging sections – particularly chord changes or rhythmic patterns – and practice them independently before integrating them into the whole piece.
Utilize a metronome to develop consistent timing and gradually increase the tempo. Pay close attention to Billy Joel’s phrasing and dynamics; listen to the original recording frequently to internalize the musicality.
Focus on smooth transitions between chords and sections, aiming for a lyrical and flowing performance. Don’t neglect the pedal work, which is crucial for achieving the song’s characteristic atmosphere.
Break down the piece into smaller, manageable chunks, mastering each section before moving on. Regular, focused practice sessions are more effective than infrequent, lengthy ones.
Consider recording yourself playing and critically evaluating your performance, identifying areas for improvement.
Performance Considerations and Interpretation
When performing Vienna, remember the song’s inherent emotional depth. It’s a ballad about slowing down and appreciating life, so convey that sentiment through your playing. Avoid rushing; maintain a relaxed tempo and allow the music to breathe.
Dynamic contrast is key. The song builds gradually, so carefully shape the phrases and highlight the emotional peaks. Pay attention to the chord voicings and use them to create a rich, full sound.
Consider the lyrical content during your performance. Understanding the story behind the song will inform your interpretation and allow you to connect with the music on a deeper level.
For ensemble arrangements, ensure tight coordination and balance between instruments. Listen carefully to each other and blend your sounds seamlessly.
Ultimately, your interpretation should be personal and expressive, reflecting your own musical voice while remaining faithful to the spirit of Billy Joel’s masterpiece.