tulip tie dye instructions pdf
- Published
- in PDF
Tulip Tie Dye Instructions PDF: A Comprehensive Guide
Ready to unleash your inner artist? This comprehensive guide to Tulip Tie Dye‚ available as a convenient PDF‚ will transform your wardrobe. From vibrant spirals to stunning ice dye patterns‚ discover the secrets to achieving professional-looking results with easy-to-follow instructions. Get ready to create wearable art!
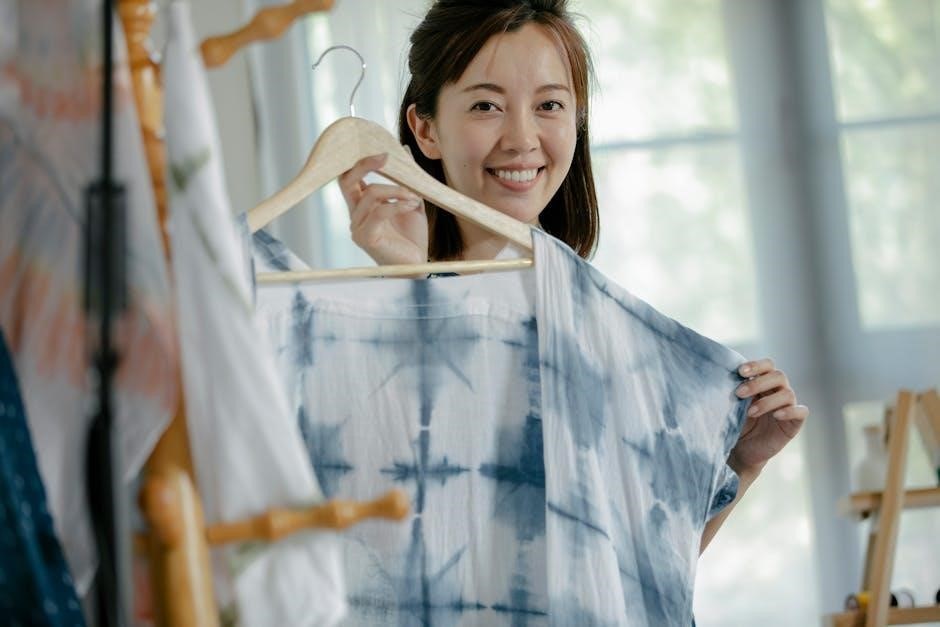
Tie-dyeing is a fantastic way to add a personal touch to clothing and accessories. Among the various tie-dye options available‚ Tulip Tie Dye stands out for its ease of use and vibrant results. Tulip kits make the process incredibly accessible‚ even for beginners. These kits typically include dye powders in squeeze bottles‚ eliminating the need for separate mixing containers. You simply add water to the bottle‚ shake‚ and you’re ready to start creating. This eliminates a lot of the mess and complexity associated with traditional tie-dye methods.
Tulip One-Step Tie-Dye is particularly popular because it doesn’t require pre-soaking the fabric in soda ash. The dye formula already contains soda ash‚ streamlining the preparation process. This convenience is a major draw for those new to tie-dye or those looking for a quick and easy project. The Tulip Two-Minute Tie Dye further speeds up the process‚ reducing the dye setting time from the standard 6-8 hours to just 2 minutes using a microwave.
With Tulip Tie Dye‚ the possibilities are endless. You can experiment with various techniques to create unique patterns and color combinations. Whether you’re aiming for a classic spiral‚ a bold bullseye‚ or a free-flowing scrunch design‚ Tulip Tie Dye provides the tools and instructions to bring your vision to life.
Materials Needed for Tulip Tie Dye
Before embarking on your Tulip Tie Dye adventure‚ gathering the necessary materials is crucial for a smooth and successful experience. The first essential is a Tulip One-Step Tie-Dye kit. These kits typically include a selection of dye colors in squeeze bottles‚ rubber bands‚ and gloves. Ensure the kit contains the colors you desire for your project; if not‚ individual Tulip dye refills can be purchased.
Next‚ you’ll need fabric to dye. Cotton‚ rayon‚ and other natural fibers work best for tie-dyeing. Pre-washed fabric is ideal‚ as this removes any sizing or finishes that might interfere with dye absorption. Choose items like t-shirts‚ tote bags‚ or fabric scraps for practice. Protective gloves are a must to prevent staining your hands. The Tulip kits usually include these‚ but extra pairs are always a good idea.
You’ll also need a work surface that can be easily cleaned. A plastic table cloth or an old baking sheet will protect your table from dye spills. Paper towels or rags are essential for wiping up any messes. Depending on the technique you choose‚ you might need additional rubber bands‚ string‚ or clamps. Finally‚ a plastic bag or container is needed to keep the dyed fabric moist while the dye sets.
Preparing Your Fabric
Proper preparation is key to achieving vibrant and long-lasting results with your Tulip Tie Dye project. Start by selecting fabric made of natural fibers like cotton‚ linen‚ or rayon‚ as these absorb dye most effectively. Synthetic fabrics may not take the dye as well‚ resulting in faded or uneven colors. Before dyeing‚ it’s essential to pre-wash your fabric thoroughly. This removes any sizing‚ oils‚ or finishes that could prevent the dye from properly penetrating the fibers.
Use a mild detergent and wash the fabric in warm water‚ followed by a complete rinse to ensure all detergent residue is gone. Avoid using fabric softeners‚ as they can also hinder dye absorption. Once washed‚ dry the fabric completely in a dryer or allow it to air dry. Ironing the fabric after drying can help remove wrinkles and create a smoother surface for dyeing. This is especially important for techniques that require precise folding or pleating.

If you’re using a new garment‚ check for any tags or stickers that need to be removed. For some tie-dye techniques‚ damp fabric is preferred‚ so you may choose to leave the fabric slightly damp after washing. However‚ always refer to the specific instructions for your chosen tie-dye method to determine the optimal fabric moisture level.
Choosing Your Tie Dye Technique
The world of tie-dye offers a dazzling array of techniques‚ each yielding unique and captivating patterns. Selecting the right technique is crucial to achieving your desired aesthetic and ensuring a successful project. Consider your skill level‚ the complexity of the design‚ and the type of fabric you’re working with when making your choice. For beginners‚ simpler techniques like the scrunch or bullseye are excellent starting points. These methods are forgiving and allow for creative exploration without requiring intricate folding or tying.
If you’re seeking more intricate designs‚ explore techniques like the spiral or mandala. These methods involve precise folding and tying to create symmetrical and visually stunning patterns. For a more organic and unpredictable look‚ consider ice dyeing. This technique involves applying dye powder to fabric covered in ice‚ allowing the melting ice to create unique watercolor-like effects.
Experimentation is key! Don’t be afraid to try different techniques and combinations to discover your personal style. Numerous online resources‚ including video tutorials and detailed instructions‚ can guide you through each step. Remember to always prioritize safety by wearing gloves and working in a well-ventilated area when handling dyes.
Basic Tie Dye Techniques
Before diving into complex patterns‚ mastering fundamental tie-dye techniques is essential. These basic methods form the foundation for countless creative designs. The scrunch technique‚ perfect for beginners‚ involves randomly crumpling the fabric and securing it with rubber bands. This creates a free-flowing‚ abstract pattern with a burst of color.
The bullseye technique‚ another beginner-friendly option‚ focuses on creating concentric circles of color. Pinch the fabric at the center and pull it upwards‚ then secure with rubber bands at intervals to create the rings. For a spiral effect‚ pinch the fabric at the desired center point and twist it into a tight spiral. Secure the spiral with rubber bands in a crisscross pattern.
Regardless of the chosen technique‚ ensure the rubber bands are tight enough to prevent dye from seeping into unwanted areas. Experiment with different folding and tying variations within each technique to achieve unique results. Remember to pre-wash your fabric and use high-quality dyes like Tulip to ensure vibrant‚ long-lasting colors. These foundational techniques will empower you to explore more advanced tie-dye methods with confidence.
Spiral Technique Instructions
The spiral technique is a classic tie-dye method‚ producing eye-catching swirling patterns. First‚ lay your pre-washed and dried fabric flat on a clean surface. Decide where you want the center of your spiral to be‚ then pinch the fabric at that point. Begin twisting the fabric around this center point‚ creating a tight‚ flat spiral‚ much like coiling a rope.
Once the fabric is fully spiraled‚ secure it tightly with rubber bands. The rubber bands should intersect at the center point‚ dividing the spiral into pie-shaped sections. These sections will be your color zones. Prepare your Tulip tie-dye colors according to the package instructions. Apply the dyes to the different sections‚ ensuring each section is saturated with color.
For a vibrant‚ multi-colored spiral‚ use contrasting colors in adjacent sections. After applying the dye‚ place the fabric in a plastic bag or wrap it in plastic wrap to keep it moist. Allow the dye to set for 6-8 hours‚ or longer for more intense colors‚ as recommended by the Tulip tie-dye instructions. Finally‚ rinse‚ wash‚ and dry your tie-dyed garment separately to reveal your stunning spiral design.
Bullseye Technique Instructions
The bullseye technique creates concentric circles of color‚ resembling a target. Start with your pre-washed and dried fabric laid flat. Pinch a small section of the fabric where you want the center of your first circle to be. Pull this section upwards‚ creating a cone shape. Secure this cone tightly with a rubber band close to the pinched point.
Continue adding rubber bands down the length of the cone‚ spacing them a few inches apart. Each section between the rubber bands will become a different colored ring. Prepare your Tulip tie-dye colors as instructed. Apply dye to each section‚ using different colors for a vibrant bullseye effect. Ensure the dye saturates the fabric within each section.

After dyeing‚ place the fabric in a plastic bag or wrap it with plastic wrap to maintain moisture. Let the dye set for 6-8 hours‚ or even longer for more intense colors‚ following the Tulip tie-dye instructions. Once the dye has set‚ carefully remove the rubber bands. Rinse the fabric thoroughly under cold water until the water runs clear. Wash and dry your tie-dyed garment separately to unveil your striking bullseye design.
Scrunch Technique Instructions
The scrunch technique is a free-form method that results in a randomized‚ textured pattern. Begin with your pre-washed fabric‚ either wet or dry‚ depending on your preference. Gather the fabric randomly‚ scrunching it together in your hands to create folds and wrinkles. There’s no right or wrong way to scrunch – the more chaotic‚ the better for a unique design.

Once you have a tightly scrunched bundle‚ secure it firmly with rubber bands. Wrap the rubber bands around the bundle in various directions to hold the scrunches in place. Prepare your Tulip tie-dye colors according to the package instructions. Apply the dyes directly to the scrunched fabric‚ ensuring the dye penetrates into the folds and crevices. Use multiple colors for a vibrant‚ multi-dimensional effect.
After dyeing‚ place the scrunched fabric in a plastic bag or cover it with plastic wrap. Allow the dye to set for 6-8 hours‚ or longer for more intense colors. Once the dye has set‚ carefully remove the rubber bands. Rinse the fabric thoroughly under cold water until the water runs clear. Wash and dry your tie-dyed garment separately. The scrunch technique produces a unique‚ organic pattern every time.
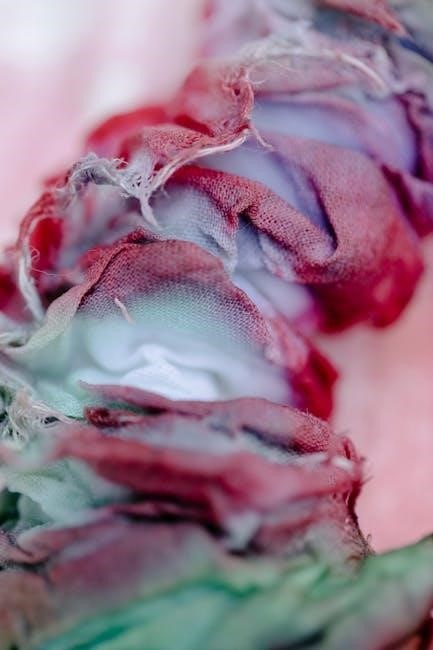
Ice Dye Method with Tulip Tie Dye
The ice dye method creates beautiful‚ watercolor-like effects on fabric. Start by pre-washing your fabric to remove any sizing or finishes. Scrunch or fold your fabric and place it on a wire rack or colander over a tub to catch the melting ice water. Cover the fabric completely with ice cubes or crushed ice‚ ensuring an even layer for consistent results.
Sprinkle Tulip tie dye powder directly onto the ice. The melting ice will gradually dissolve the dye‚ creating unique patterns as it seeps into the fabric. Use multiple colors for a vibrant and unpredictable effect. You can strategically place different colors on specific areas of the ice for more controlled results.

Allow the ice to melt completely‚ which can take several hours. Once the ice has melted‚ carefully remove the fabric from the rack. Rinse the fabric thoroughly under cold water until the water runs clear. Wash and dry your tie-dyed garment separately. The ice dye method produces stunning‚ galaxy-like patterns that are truly one-of-a-kind. Experiment with different folding techniques and color combinations to achieve your desired results.
Mixing Tulip Tie Dye Colors
Unleash your creativity by custom-mixing Tulip Tie Dye colors to achieve unique and personalized shades. Start by understanding the color wheel; knowing which colors complement or contrast each other will guide your mixing process. For pastel shades‚ dilute your Tulip One-Step Tie-Dye with water to create softer‚ more subtle hues.
When mixing‚ begin with small amounts of dye powder and gradually add more until you reach your desired color intensity. Keep in mind that the color will appear darker when wet and will lighten slightly as it dries. Always test your mixed colors on a small scrap of fabric before applying them to your main project to ensure you are satisfied with the result.
For vibrant neon colors‚ use the Tulip One-Step Dyes directly‚ or experiment with mixing different neon shades. Remember to follow the package instructions for the correct water-to-dye ratio to achieve optimal results. Document your color recipes so you can recreate your favorite mixes in the future. With a little experimentation‚ you can create a stunning array of custom tie-dye colors for your projects.
Applying the Dye
Now comes the fun part: applying the Tulip Tie Dye to your prepared fabric! Ensure your work surface is protected with a plastic covering‚ as the dye can stain. Wear gloves to protect your hands from unwanted color. If using a wet technique‚ apply dye directly from the washer. For dry techniques‚ ensure your fabric is thoroughly dried in the dryer before proceeding.
When applying the dye‚ be generous and saturate the fabric‚ especially in the areas where you want the most intense color. Use the squeeze bottles provided in the Tulip Tie Dye kits to precisely control the dye flow. For spiral and bullseye patterns‚ apply the dye in concentric circles‚ working from the center outwards; For scrunch patterns‚ randomly apply the dye‚ ensuring all folds and creases are saturated.
Consider using multiple colors for a vibrant‚ multi-dimensional effect. Apply different colors to adjacent sections of the tied fabric‚ allowing them to blend slightly for a watercolor effect. Once you have finished applying the dye‚ carefully place your dyed fabric in a plastic bag or wrap it in plastic wrap to keep it moist while the dye sets. This will prevent the dye from drying out too quickly‚ ensuring optimal color absorption. Now‚ proceed to the dye setting stage!
Setting the Dye: Time and Temperature
Proper dye setting is crucial for vibrant‚ long-lasting tie-dye results with Tulip Tie Dye. The recommended setting time typically ranges from 6 to 8 hours‚ or even longer for more intense colors. This allows the dye molecules to fully bond with the fabric fibers‚ ensuring the colors won’t fade or bleed during washing.

Maintain a consistent temperature during the dye setting process. The ideal temperature is room temperature‚ around 70-75°F (21-24°C). Avoid placing the dyed fabric in direct sunlight or near a heat source‚ as this can cause the dye to dry out prematurely and affect the color vibrancy. Ensure the fabric remains damp throughout the setting period.
For an accelerated dye setting process‚ consider using Tulip Two-Minute Tie Dye. This innovative technique significantly reduces the setting time to just two minutes‚ using a microwave. Follow the specific instructions provided with the Tulip Two-Minute Tie Dye kit‚ being careful not to leave the microwave unattended. Remember‚ proper dye setting ensures your tie-dye creation remains colorful and beautiful for years to come‚ making your efforts truly worthwhile!
Tulip Two-Minute Tie Dye Instructions
Unleash your creativity in a flash with Tulip Two-Minute Tie Dye! This revolutionary technique allows you to achieve vibrant‚ permanent tie-dye results in just minutes‚ making it perfect for quick projects and impatient crafters. Unlike traditional methods that require hours of setting time‚ Tulip Two-Minute Tie Dye utilizes a microwave to accelerate the dye-bonding process.
First‚ prepare your fabric and apply the Tulip One-Step Dye according to your desired tie-dye technique. Ensure the fabric is thoroughly saturated with dye. Next‚ carefully place the dyed fabric in a microwave-safe container. Follow the specific heating instructions provided with the Tulip Two-Minute Tie Dye kit‚ paying close attention to the recommended time and power settings.
It is crucial to monitor the microwave closely during the heating process and avoid leaving it unattended. Overheating can damage the fabric or affect the dye quality. Once the cycle is complete‚ carefully remove the container from the microwave and allow it to cool slightly before rinsing and washing the fabric according to the instructions. Enjoy your vibrant‚ instantly-gratifying tie-dye creation!
Washing and Drying Your Tie-Dyed Fabric
Proper washing and drying are crucial to preserving the vibrancy and preventing color bleeding of your newly tie-dyed fabric. After the dye has set for the recommended time‚ typically 6-8 hours or as specified in your Tulip Tie Dye kit instructions‚ it’s time to rinse away the excess dye. Remove the rubber bands or ties carefully‚ and rinse the fabric under cold running water until the water runs clear.
Next‚ wash the tie-dyed fabric separately in cold water with a mild detergent. Avoid using bleach or detergents with added brighteners‚ as these can fade the colors. For the first few washes‚ it’s best to wash the item separately to ensure any remaining loose dye doesn’t transfer to other garments. After washing‚ you can either air dry the fabric or tumble dry it on a low setting.
Avoid high heat‚ as it can cause the colors to fade or the fabric to shrink. If air drying‚ hang the garment in a shaded area to prevent direct sunlight from fading the colors. By following these washing and drying instructions‚ you can keep your tie-dyed creations looking vibrant and beautiful for years to come!
Troubleshooting Common Tie Dye Problems
Tie-dyeing can be a rewarding experience‚ but sometimes problems arise. One common issue is faded or uneven colors. This can occur if the dye wasn’t properly mixed‚ the fabric wasn’t pre-washed‚ or the dye didn’t set for long enough. Ensure your dye is thoroughly mixed according to the Tulip Tie Dye instructions PDF and that you pre-wash your fabric to remove any sizing or finishes that could prevent dye absorption. Also‚ be patient and allow the dye to set for the recommended time.
Another problem is color bleeding during washing. This usually happens when excess dye wasn’t adequately rinsed out. Rinse your tie-dyed item thoroughly under cold water until the water runs clear before washing. If bleeding persists‚ try washing the garment separately in cold water with a color-catcher sheet.
Sometimes‚ the tie-dye pattern may not turn out as expected. This could be due to incorrect tying techniques or uneven dye application. Practice your chosen tie-dye technique on scrap fabric before applying it to your final project. Ensure you apply the dye evenly and thoroughly to all desired areas. By addressing these common issues‚ you can overcome challenges and achieve stunning tie-dye results!
Advanced Tie Dye Techniques and Tips
Once you’ve mastered the basic tie-dye techniques with your Tulip Tie Dye kit‚ it’s time to explore advanced methods for unique and intricate designs. One such technique is Shibori‚ a Japanese tie-dye method that involves folding‚ clamping‚ and binding fabric to create complex patterns. Experiment with different folding and clamping techniques to achieve varied results.
Another advanced technique is using multiple colors in a gradient effect. Carefully plan your color placement and apply the dyes strategically‚ blending them where they meet to create a smooth transition. You can also try using stencils to create specific shapes or designs within your tie-dye pattern.
For professional-looking results‚ consider using a dye fixative to enhance color vibrancy and prevent fading. Also‚ pre-treating your fabric with soda ash can improve dye absorption. Remember to always follow the Tulip Tie Dye instructions PDF for safety guidelines and recommended dye-to-fabric ratios. With practice and experimentation‚ you can elevate your tie-dye skills and create stunning‚ one-of-a-kind pieces.